Thursday, March 18, 2010

Feel The Heat

If you thought all I photographed was nature, landscapes, and wildlife, you do not know me very well. Being the adrenalin junkie that I am, I am always up for something exciting and a little risky. Welcome to some live action, fully involved, in progress fire photography. Since I am an Edwardsville Police Officer, I work closely with our fire department. They are nice enough to loan me some turnout gear and let me get right in the middle of the action to photograph it.
Some of these photos are from live fire training exercises, and some are from real structure fires. I cannot wear breathing apparatus or gloves while inside because it would be to difficult to work my camera. Usually the smoke and heat force me out pretty quick, but that is ok as the temperatures get so hot it would start melting the plastic parts of my camera equipment. Being a police officer I have gone into many burning buildings even before the fire fighters arrived on scene to take a look for victims. This is usually only as long as you can hold your breath as the smoke will overwhelm you very quickly. Hanging around inside and capturing the fire as it continues to spread and get hotter and hotter is a whole different experience.


The first few times I was inside a live training fire I did not wear any gear. I usually could grab just a couple shots before the heat and smoke drove me out. On a training exercise there was a flashover while I was shooting from behind the main entry team. This explosion of gases in the air melted some of the hair on my head and my eyebrows. It was so intense that a firefighter received steam burns from the sweat on his arm inside his turnout gear due to the flash over fire getting so hot from that incident. So it was decided I probably at least should be wearing some gear so I didn't catch myself totally on fire one of these times.  


These photos are just a few of the many I have taken over the past few years. Although there is some danger involved, the risk is minimized with all the safety plans and backup teams in place. The fire department is very well trained and prepared for any problems that arise during these incidents. Not to say that there isn't some risk. Just a look at the photos will give you some idea of the intensity of the situation.

How hot is it? Take a look at the ceiling fan, it is melting. The fire deparment will get an old abandon house that is going to be torn down. They get permission to use it for training. They will set fires using bales of hay and wood pallets and fire fighters will make entry and put out the fire. They can get many live fire training drills this way before the house is finally allowed to burn down. Nothing better than live fire training to really lean how to deal with it. 
Our city is fortunate to have a highly trained professional fire department. I have worked with them and helped train their arson investigators in crime scene photography and evidence collection. It is an honor to work with them, and I salute them for the dangerous job they preform. 
This last photo is one of my favorites. It is titled "The Doorway To Hell" The firefighter in the photo is Lt. Rodney Hall of the Edwardsville Fire Dept. This was a live fire training exercise and was to be the last one of the day. The back of this old farm house had a room across the back. The room was ignited and allowed to really get rolling. When he kneeled down and opened the door, the rush of air caused the fire to just explode and come rolling out into the room. I was actually outside shooting through an open window and the heat was so intense I could only manage a couple shots before the heat forced me to turn away. As soon as they hit it with water the smoke is so thick you cannot see anything. You are totally blind if you are inside. That gets a little scarey and disorienting. With the right equipment and manpower, it is amazing how fast they can knock the fire down and get it under control. 

I will eventually post more action fire photos as I have a large amount of them in my portfolio..

Scott 

Wednesday, March 17, 2010

City Skylines


Photographing city skylines at night is a real challenge if you want to get a really good photograph. First you need to find a great vantage point to create a good composition. Then you need just the right light to balance your sky against your foreground, and not blow out all the lights. Since I have always done these with just one shot, it is a matter of shooting several shots as the sky gets progressivly darker. You can make adjustments in Photoshop or some other editing program, but you can only fix so much. The big thing in digital photography is now HDR. This stands for High Dynamic Range.  In simple terms, you take anywhere from 3 to 7 exposures and bracket with over and under exposures. This captures all the detail in the brighest lights, and all the detail in the darkest shadows. This data is then brought into Photoshop and it blends all this data together to create the image. There is a seperate software called Photomatix that processes these tpes of merged files even better than Photoshop does. I have the software now and have just started experimenting with this type of photography.

Living very close to St. Louis gives me a good skyline to practice on. These are long exposure shots were a tripod and cable release are mandatory. The worst thing about these are being down on the East St. Louis riverfront after dark. A nasty crime ridden place. I have observed river rats bigger that small dogs.


Here is a skyline scene I did of Nashville TN. from my last trip there. I was on an old bridge that had been converted to a bicycle and foot traffic only bridge. That is the Cumberland River that winds around the city of Nashville. I had to wait for the sun to get down far enough below the skyline to bring out the colors and cloud detail. These really are about patience and timing.
This is a panoramic scene of the Chicago IL. skyline all the way out to the end of Navy Pier. This is 12 vertical photos stitched together in Photoshop. I had never tried to do one of these at night. I was in Chicago for a seminar so I went out to the Adler Planetarium and shot it from there. I waited until the sun got down to the left side of the photo, but you can see the dramatic falloff of light across the city as the sun is now below the horizion at this point. I felt it was OK for a first attempt, but I need a lot more practice. If you click on any photo they will open in another window so you can see them a little better. 

Tuesday, March 16, 2010

Photographing Water Falls


There are two things I find to be the most relaxing, stress relieving sounds in the world. One is the sound of waves rolling up on the beach, and the other is a waterfall. Photographing waterfalls requires a little bit of effort and thought to really create a nice image. The look of the water can be dramatically changed by the shutter speed used. A fast shutter speed freezes the action or motion of the water and gives it that time stood still look. I prefer the long exposure shots that make the water smooth out and go to that cottony soft look. To me this implies motion even though you are looking at a still photograph.This requires a tripod and a long shutter exposure. Normally between 2-4 seconds will create this soft effect on the moving water. The great thing is you can find small waterfalls almost anywhere.


I was at a conference at the Opryland hotel in Nashville, TN. last year. The giant indoor atrium of the hotel is pretty amazing. It is like a giant botanical garden complete with a man made river and numerous waterfalls. By carefully framing and composing your shots, you can create some beautiful images. These two waterfall shots on the left are from inside the hotel atruium.
 This waterfall on the right is Laural Falls in Smokey Mountain National Park. It is about a 1.5 mile hike up to capture this  photo. I was there in the fall, and it had been very dry.The water volume of all the falls was low compared to their normal flows. But even a small trickle of water can be transformed into a beautiful scene with a long exposure capture. 

I just seem to have bad luck when I stop to photograph a natural waterfall. It is always a dry spell and the water volume of the falls is much lower than normal. This photo on the left is Rainbow Falls, located in Hilo HI. It is an 80 foot high fall that at full volume can be as much as 100 feet across. Now Hilo is one of the wettest places in the United States. But, the short time I was there, it had been extremely dry. So I still managed a nice watefall shot, but It would have been much more dramatic to have about five times as much water flowing over that lava shelf. So I guess I will just have to go back and try again! 
Just have your camera on a sturdy tripod and use a cable release. A low ISO setting and stop down to between f11 to f22 will usually give you a 2-4 second exposure even in fairly bright daylight. If you need a longer exposure, add a polarizer filter to your lens and it will darken the scene and force your camera to use an even longer exposure.

Scott

Monday, March 15, 2010

Black and White Photography

When I first started learning photography in high school, I was mostly self taught, and I shot everything on B&W film. It was the cheapest, and a buddy had a dark room in his basement. We learned to develop and print our own work. Most of us older folks that learned this way still have a strong affinity for B&W prints. I on the other had much preferred color photography. I simply could not afford the film and cost of sending everything to the lab. My reasoning was I see in color, and I always felt it was more realistic in my mind. When I got back into photography and started studying some of the master photographer's works in some of my college classes, I started re-thinking my opinion of B&W photography. Now I really look at everything I photograph and consider how it might look as a B&W print. The great thing about the digital dark room is the luxury of shooting everything in color, and making the conversion in a photo editing program. They have become so sophisticated that it is a snap to get a nice B&W conversion. Now I have many of my photos as both a color, and a B&W file. Since you know how much I love old barns, many of them get converted. The photo above is actually what is called a Double-sided Corn Crib. Each side held picked corn on the ear to dry in the slatted bins. A hay loft is above the corn cribs.
This is a street scene from Nashville TN. I though it made a good conversion to B&W here. Sometimes if the light was contrasty or the exposure range to great to get everything correct in a single shot, B&W seems to save some of those for me. This rail road bridge is a favorite B&W photo that I have printed to poster size. When I saw the bridge, I was already thinking B&W before I risked my neck climbing  up to get it. This bridge is in down town Nashville on Front St. and goes across the Cumberland River. I used a super wide angle of 10mm here and got right down on the ties and rails to create this composition. It was a cloudy overcast day, and this created a even better moody feeling sky for me. 

This old barn was photographed in Cades Cove, Smokey Mountain National Park. I was not happy with the color version due to a lot of filtered sunlight hitting the barn. When I converted it to B&W, I though it made a much better shot and the filtered sunlight did not  seem to be distracting. I have a much greater love and appreication for B&W photography now that I can have my cake and it it too.

Take Care,

Scott

Friday, March 12, 2010

Chasing Storms

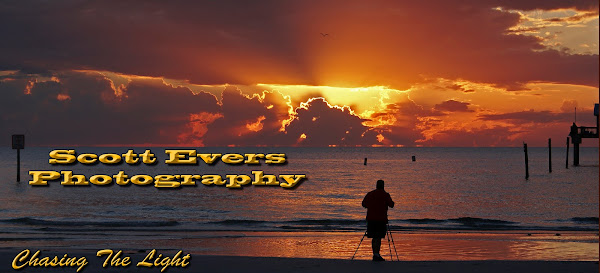
Beautiful sunsets and sunrises are probably one of my favorite things to photograph. This is a photo of me taking a sunset photo on Clearwater Beach, in Florida. The gentleman that took it was kind enough to let me download it on my laptop that night. But I also like to chase storms and try to get some dramatic clouds and lightning photographs. This is not nearly as easy as setting up on the beach and waiting for the sun to set and casually snap away with no real sense of urgency. Chasing storms and lightning is much more work, and the success rate for good quality shots is much lower.

 One summer my good friend Scott Hale and I spent quite a few nights chasing storms to try and photograph lightning. The difficult part was getting ahead of them and finding a place to set up so that we could have a good overall foreground scene instead of just photographing lightning in the sky. We chased one all the way up to Pere Marquette State Park in Grafton, Illinois. While standing on the overlook near the top of the bluff looking out over the Illinois River Valley, we thought we had gotten ahead of it and we would get some dramatic shots. But the very powerful storm had gotten in behind us and we did not see it coming until it blew in right over the trees on top of us. We were running for the car with lightning, heavy rain, and powerful winds dropping trees all around. Our success rate was low, but we had a lot of fun and managed not to get killed.


This photo above I took in June of 2006 on a trip to Ft. Walton Beach, Florida. That year Florida had experienced several hurricanes, and one was coming north through the Gulf of Mexico. It turned east and headed inland about 120 miles south of the Ft. Walton Beach. It created these ominous looking clouds and some big surf. The next morning it was sunny and beautiful, just like most Florida days.

We had some nice lightning the other morning with thast first spring storm, but I was to lazy to get out of bed at 2:00am and  try to get any photos. I snapped this photograph a couple summers ago. One of those hot August summer thunderstorms that blowup late in the afternoon. The heavy rain prevented me from getting the real dramatic lightning. The storm was already moving south by the time I could get outside to take any shots. This year I have promised myself I will get some better storm and lightning photograhs. Normally I have my camera on a tripod and use a cable release. This works well at night as I can usually get the shutter open before the lightning dissapears. During the day it is much harder, and the success rate is pretty low. There is a device called a Lightning Trigger. It fits in the hotshoe of your camera and triggers your cameras shutter when it senses a flash of lightning. This works much faster than a human using a cable release.
A really useful device, but it is pricey at $329.00 Here is their website for anyone that might be interested. It is another one of those items on my wish list.   http://www.lightningtrigger.com/

Have a great weekend!

Scott

Wednesday, March 10, 2010

Spring is Coming!

It is suppose to be near 70 degrees today. While not the beautiful sunny spring day we all want and love, it has not been this warm here for quite some time now. So I will gladly take the warmth, even if it is a little gloomy looking. The best thing about the warmer temperatures is the things it triggers in nature to start the change into spring. I know it's a little early, but as a photographer spring is a great time to get outside and get some great shots.

Usually the American Robins will start showing up in force. Now you will see them occasionally throughout the winter as they are year-round residents here. But usually in March they start showing up in large numbers feeding on the worms and bugs emerging from your yard. Males and females look quite a bit alike, but females tend to be more gray and dull colored such as this female in the photo above is.


The Crocus flowers are pushing through now and will bloom very soon. This will start the explosion of color to follow with all the later flowers such as these daffodils' in the these two photos. This is a great time to start on your macro photography skills. This is the type of photography that you can do in your own yard. 
All you need is your camera with a macro or good close focusing lens, a tripod, cable release, and some patience. Getting down low to the same level of the subject you are shooting is critical to creating that good composition. Use a shallow DOF to create that soft out of focus background that makes these types of photos look so good.


Of couse this then brings out all the insects!  As a lover of macro photography, this is a good thing. So I am hoping for a continued warm up to kick spring into high gear. It also triggers the instincits in me to get out and start searching for new subjects to photograph.

Tuesday, March 9, 2010

Sunsets and Fishing Piers

There are always certain types of photos that we love and are drawn to. Personally I have always loved the sunsets over the ocean with a fishing pier in them. Many people would say they are cliché type post card shots, but I don't care. When people see the photographs I do of them, they love them. I sell quite a few prints of them. I also do them in note cards that are also quite popular. Having been born and raised in the mid-west, I only saw the oceans when I went on vacation. Fortunately my parents loved to travel and we always took some great vacations. If I would win the lottery someday, I would split my time between a home on a tropical beach, and a small ranch out west somewhere in the mountains.
Hanging out on a beach and watching a glorious sunset into the ocean is truly a relaxing experience for me. What most people miss is the best part of the show. As soon as the sun slips below the horizon, most people take off thinking the best part is over. Actually some of the most beautiful light and colors start then. There is a window of time, usually 10-20 minutes, when the sunlight is reflecting back into the sky over the curve of the earth and lighting the underside of the clouds. That is when you see the most vivid colors in the sky. This also applies to the sunrise before the sun comes up over the horizon, but the time frame for the best colors is much shorter.

Doing this type of photography is not very difficult, it just requires a little planning, some patience, and some basic equipment. I will usually scout out the scene an hour or so before sunset to see the angle, and where the sun will be going below the horizon in relation to what I am going to use as my main subject. I think about what I want the composition to look like and I will take a couple test shots hand held to see how it will look. Then it is a matter of waiting until the right light.


These are long exposure shots so the camera needs to be on a sturdy tripod. I use an electronic shutter release to trip the shutter. If you do not have a shutter release cable, you can use your camera's self timer to trip the shutter so you are not in contact with the camera. You want to avoid introducing any type of possible vibrations that might cause blurring. Since these are usually pretty long exposures, I do not use the mirror lockup feature like I would doing macro photography. I usually use the camera's evaluative metering system on the first shot and look at the results on the back of the camera. I usually then have to make adjustments depending on how the histogram looks. I either switch to manual mode and bracket the exposures, or I just use exposure compensation if it does not need much correction.


This last photo was not a sunset photo. This is a shot of the Sanibel Island Fishing Pier and Lighthouse taken about 15 minutes after the sun had set behind me. I wanted to catch the twilight night sky which is the blue to purple colors you get before the black night sky. Long exposures also tend to give everything a strong blue color cast anyway. This was shot from the causeway back to the mainland. I used a 500mm telephoto with a 1.4 extender to give me 700mm of focal length. This was about a 30 second exposure. I thought it made a unique looking photograph.

Monday, March 8, 2010

A Week of 800mm Fun

For those of you that followed my blog last week, I spent a full week in Florida doing bird photography. I was really excited to get to use Canon's 800mm f5.6 L image stabilized lens for the entire week. As a registered professional photographer with Canon, they will loan you equipment to try and evaluate. So I emailed them and asked if it were possible to borrow an 800mm lens. This is Canon's largest lens that they currently manufacture. They have made several 1200mm lenses in the past but they are no longer producing them. I just checked the price of a Canon 800mm lens on B&H Camera in New York City. It was $10,900.00, so needless to say I will not be buying one any time soon. Now my good friend Mark McAmish has a Canon 500mm f4.0L IS lens that he lets me use on a regular basis. I fact it is usually on my camera more than his. If I add my 1.4 extender to that, I get 700mm of focal length at f5.6. So what is the advantage to the 800 lens? Well adding an extender slightly degrades image quality, and it slows down the electronics of the focus tracking system of the camera. Plus it is amazing how much that extra 100mm of focal length matters when you are trying to reach subjects that are pretty far out.

I had several people ask me how big and heavy the 800mm lens was, so I pressed my wife into service to snap a couple photos of me holding the lens attached to a camera body. This will give you an idea of the size of this lens. Since it is Canon's newest super telephoto lens, it has new lighter materials in it than their older 500 and 600mm lenses. So it is actually only 2 1/4 inches longer than the 500 and only slightly heavier. I have hand held a few shots with the 500 that came out good, but I did not even try with this lens. All shots were off a tripod and using a Wimberly Head.


Then I took a photo on the right of the 800 with it's lens hood attached standing
next to my 70-200mm zoom with it's lens hood attached. It really shows how big this lens is.

This is truly a special piece of equipment that has a specific purpose. It is mostly a nature and wildlife lens. The focal length is to long for most any type of sports photography. In fact I had trouble keeping the whole subject in the frame if they got close. How often as a photographer do you have to back up because you are to close? Hardly ever. Most of the time you are trying to get closer to fill the frame up in your viewfinder. But used properly, this lens can create some amazing photographs.
The eagle portrait on the right here was taken the day after the lens arrived before I headed to Florida. With the 800's powerful optics, I was able to isolate this shot through some branches while shooting almost straight up. When he glanced down at me I was able to make this shot. The color and detail brought out by this lens is awesome.
This shot below was taken on my last day in Florida at the Venice Rookery. This male Great Egret is bringing a stick back to the nest. He has his full breeding plumage and colors showing here. He was flying across the lake on his return to the nest. The out of focus background are trees across the lake. The 800 did a superb job of bring out the colors and detail in the birds plumage. He was pretty far out, but the 800 had no problem bringing him close enough to make a good photograph. 
       

Sadly I had to ship the lens back to Canon. I have started saving my change in hopes of some day being able to afford to buy this lens. But until then, Mark old buddy, when are we going out shooting again with your 500?


Friday, March 5, 2010

J. N. "Ding" Darling National Wildlife Refuge


There are countless amazing locations to photograph wildlife in Florida. There are dozens of books and publications that cover everything you would want to know on the subject. I regularly visit one of the top rated bird photography spots in the country. It is located on Sanibel Island, off the coast of Ft. Myers. J.N. "Ding" Darling National Wildlife Refuge is a bird photographer’s paradise. I have made the trip to this place at least once or twice a year for the past five years. I usually spend several days photographing the diverse bird population that can be found there.


One of the big attractions at the refuge is the large colony of American White Pelicans that come to winter and start their breeding season. It is fun to watch these large birds come crusing in for a landing in the shallow waters to feed or rest. They are a good target to practice your in-flight photography skills on as they are very large and do not move erratically like many birds do. They will winter as far north as the St. Louis area. You can see them in the Riverlands Wetland Area over in West Alton.
 

Another favorite target of mine is the numerous Ospreys that are found in the refuge. The Osprey (Pandion haliaetus), sometimes known as the sea hawk, is large raptor reaching 24 inches in length with a 5-6 foot wing span. It is brown on the upperparts and predominantly greyish on the head and underparts, with a black eye patch and wings. Fish make up 99% of their diet. They are efficent hunters and have hugh curved talons for grabbing fish just below the surface of the water.


This photo is of a Female Common Merganser Duck. The long, narrow bill with serrated edges readily distinguishes mergansers from all other ducks. Common mergansers are among the largest ducks, but are less stocky than eiders and goldeneyes. In flight, they appear more elongated than other ducks, flying in trailing lines close to the water's surface. Male common mergansers have a greenish-black crested head and upper neck. The lower neck, breast and underparts are creamy-white with a variable pink wash. They have black backs and upperwing coverts with white scapulars. The bill is red with a blackish culmen and nail. The legs and feet are a deep red. Female common mergansers have a tufted red-brown head that is clearly defined from the lower neck by a clear whitish chin. The back and sides are silver-gray and the breast and belly are white. The bill is red with a blackish culmen and nail. The legs and feet are deep red.


Although the weather has been less than ideal for my entire week in Florida, It was still better here than in St. Louis. But the sun has set on my final day here and I will be returning home on Saturday.

Have a great weekend.

Scott


Thursday, March 4, 2010

Sanibel Island Photography

Thick clouds, cold temperatures, and a stiff wind do not make for good conditions to do bird photography in a sub-tropical climate. Upon my arrival at Ding Darling National Wildlife Refuge, there were only a few birds around. Most were sittting far back in the trees trying to stay warm. There did not appear to be any signs of a break in the clouds so I did what any good photographer would do. I went to breakfast. Then I took my wife shopping. While keeping my eye on the skies, I saw a few breaks in the clouds. My wife was nice enough to keep shopping and allow me to head back to the refuge.


Small pockets of sunlight started peeking through breaks in the clouds. Although there was not much to photograph, I was able to spot this Great Blue Heron perched on a log.  He was sitting back in a dark spot, but had some sunlight shining on him. I spot metered on the heron and it allowed the background to go completely black. I think it makes for a dramatic photograph. But then it clouded up again and the photography was on hold for a while.


Finally late in the day the skies cleared and I was able to start looking for something to focus that 800mm lens on. I headed to the south end of the island by the lighthouse. There is a nesting pair of Osprey that have been there for a few years using the same nest. I pulled into the parking lot and was setting up when this Osprey landed in the tree right over my head. (My luck was finally improving) It appears that fresh Flounder was on his menu as he started to feed. I actually had to back up across the parking lot to get him all in the frame.  (How rare is that when you have to back up instead of trying to get closer) He kept having to flare his wings to keep his balance as the wind was still blowing pretty hard.   


With the sun quickly going down and clouds starting build, I headed out onto the beach to try some shorebird photography. To be honest, I do not know exactly what species of shorebird this is, but I think it is a Black Bellied Plover, but I will have to ID it when I get home. There was a nice soft light at this point, and I was able to get a few photographs. There were a lot of people on the beach and it became to difficult to do any photography, so I called it a day. I wanted to get a nice sunset, but off shore clouds were moving in. So I have posted a nice sunset I did from Blind Pass Beach that I did last year at this time.


Have a great day


Wednesday, March 3, 2010

The Reddish Egret

Weather was the big factor in the photography action, or lack there of today. The rain started about 6:30am and did not stop until almost 10:00am. So I had time to do a leisurely breakfast at my favorite early morning eatery on Sanibel Island, The Light House Café. I highly recommend this place if you visit here. When the sunlight broke through I headed to Ding Darling National Wildlife Refuge to try to get some photography in. The light was getting very harsh and a fast rising tide had chased most of the birds away by the time I arrived. Fortunately I did find two differant Reddish Egrets to photograph. The Reddish Egret is a really fun bird to watch and photograph as they hunt for food.

The Reddish Egret is a coastal species with a limited range. Seldom found inland, it breeds along the Gulf Coast of Texas, Louisiana, and Alabama, and around both coasts of Florida. It is also seen in southern California, Mexico, Belize, Cuba, the Bahamas, and other Caribbean islands


The Reddish Egret is considered one of the most active herons, and is often seen on the move. It stalks its prey visually in shallow water far more actively than other herons and egrets, frequently running energetically and using the shadow of its wings to reduce glare on the water once it is in position to spear a fish; the result is a fascinating, graceful dance. It eats fish, frogs, crustaceans, and insects. The bird's usual cry is a low, guttural croak. There is a rarer version of the Reddish Egret. It is a White Morph Phase Reddish Egret. It is not an albino, but a white morph phase of the bird. This photo of a white phase was taken on one of my previous trips to Ding Darling NWR.


The heavy clouds rolled back in and stayed through sunset. The weather prediction for tomorrow is a mix of clouds and sun, but more toward the cloudy side. Will be keeping my fingers crossed for some decent light in the early morning.